 We have a period of time, right after Christmas and before early March that our weather is at its worse and we typically do not do much outdoors. It is a great time to do indoor projects and on our old fixer-upper house there are many to do. One year, Brian added shelves to our laundry room. Another time, we closed in the extra unneeded doorway to my office and remodeled. And in
  another year, we removed very ugly wallpaper in our living room and dining room and refinished the walls. This year we decided to re-do our kitchen floor.
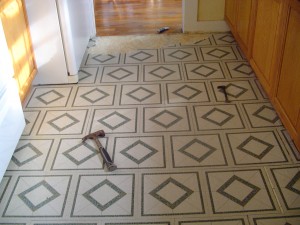
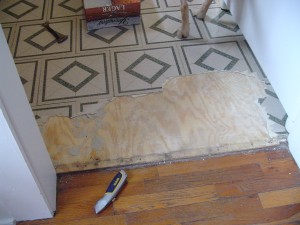
The floor was covered with cheap stick on tiles that over the years came loose, curled back, broke off, yada, yada. It was nasty and I hated that it looked so crappy. Several years ago, when we had to pull out the built-in 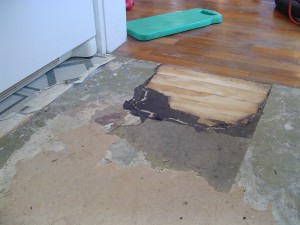 dishwasher for repairs, we saw underneath that our floor was hardwood.
So, on one cold Sunday in early January, we decided we would expose the hardwood to match the rest of our house. The plan was to remove the tiles, sand, stain and urethane. Our best estimate was that we could complete the project in two weekends. On the first weekend, we would remove 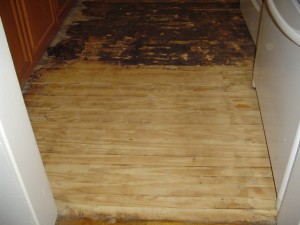 the tiles and do the sanding. On the second weekend, we would stain and finish. Aaah, the best laid plans… We began scraping off the sticky tiles and discovered a sheet of luaun. We removed the luaun and discovered a layer of linoleum. We removed it and discovered a layer of tar based mastic adhesive. Underneath that was another layer of tiles and under that was another layer
 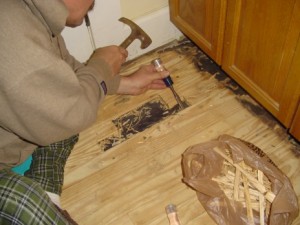 of the tar based adhesive. We scraped the linoleum and the next layer of tiles, thus removing the one layer of that tar based icky stuff, but the bottom layer was going to be problematic. We tried scraping, mineral spirits, goo gone, and other products to remove this icky coating, but nothing was working. I researched the internet on how best to remove this stuff and found out that even Bob
  Vila had no answers. Most sources said it couldn’t be done and to replace the flooring with new hardwood. One source suggested using hot steam.
We wanted to save our old floor, so we got out the iron and tried it. Yes, it did work the best. Heat up that black tarry gunk and scrape. It was hard, arduous work. It was not perfect. That bottom layer of gunk separating us 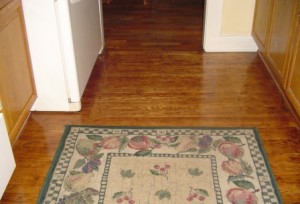 from our hardwood floor had probably been on there for 60 years and probably full of asbestos, too. So, we needed to get the floor as clean as we could before doing any sanding. Five weekends later, we were ready to sand.
At this point, we moved the range out of the room. We wanted to remove the 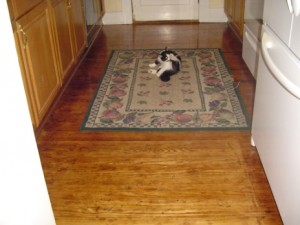 refrigerator, too, but the only way to fit it through the doorway was to remove its three heavy doors. We decided we would try to work around it, pulling it out away from the wall to work on that area and pushing it back into place while we did the rest of the floor.
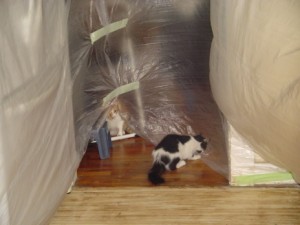
It took another two very inconvenient weeks to finish this project, what with not being able to walk on the floor or use the stove or get to the refrigerator, but it is done. Just in time to get out and start working on the outdoor projects.


Cindy and Brian terrific job. Tell/ask Brian if he can do our kitchen floor when he comes up for Shani’s wedding. Tee Hee!
How about if you tell/ask him! LOL
No Laughing! Tee hee!
mom, i hate how you laugh, “Tee Hee” you are goofy! Aunt Cindy love the cat in the middle of the floor for the end picture. Ironicccc
Like I said it looks great and I know what a difficult job it can be. Congrats!
I saw hardwood floor advertised for $1.99 sq/ft. So if my house is 1200 sq ft that’s $2400 plus installation so I figure Steve and I just saved ourselves about $3500. Holy Smokes!
I can’t wait to see your hardwood exposed! How is it looking so far?
Stained in places from the dogs…but whatever I still love them (The floors and the dogs)!
It is beautiful…really shiny…congrats on your hard work! If it were Dad, he would be still working on it!! (He’d be 87 this birthday!) Wow, that make me really old!! Looks like Charlie likes it.
It’s beautiful! I’m so jealous!